
Happy Friday! Who still has a long list of makes for this season? :HANDS UP: Making and crafting during the holidays is one of our most treasured parts. Who doesn’t love handmade things to treasure year after year?!
An Origin Story.
Last year (or was it the year before that? who even knows what years are anymore), I needed to make myself a tree skirt. Like, five-days-before-Christmas-NEED-TO-NOW needed. You know the kind.
Somewhere I had seen a tutorial on a very precise chevron skirt using a quilt-as-you-go method. I thought “that’ll do; but who has time to follow directions” and with the method in the back of my head I just WENT FOR IT (Guys, I have looked and looked for that original tutorial that inspired this skirt and can’t find it – so if you think you might know which it was please let me know!!). My chevrons were all over the place, my angles weren’t uniform, my strips weren’t uniform, my colors weren’t totally conventional and I was IN. LOVE.
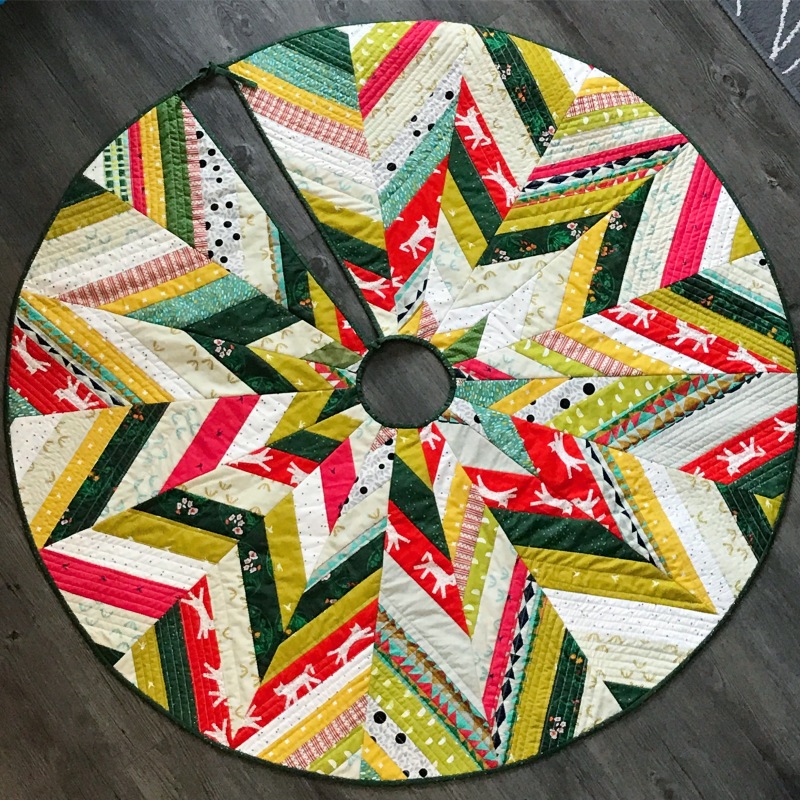
And thus, the Star Burst Tree Skirt was born. And I want you to have one too!
STAR BURST TREE SKIRT
((I would LOVE to see what you make! #starbursttreeskirt and tag @evquilts))
Things you need:
I’m a little haphazard with my fabric on this. That being said:
- Template for triangles (I used this template from a Gotham Quilts tutorial and lengthened it by about an inch or so to the end of the page)
- 3ish yards total for the top : Gather a bunch of things you love. Maybe 12 different prints at least? You can make it as random or as uniform as you want. You’ll cut these into strips that are WOF (width of fabric) so don’t use fat quarters. Grab quarter yards, or half yards or just grab a ton of stuff from your stash and have at it! The key to a good burst effect is definitely the light/dark value of your fabrics. Try to choose some DARKS and some LIGHTS and everywhere in between. Pairing the darks and lights really makes the bursts pop.
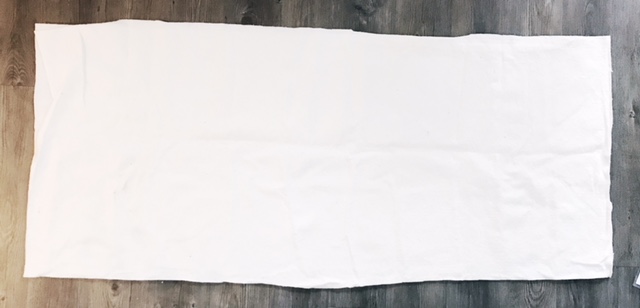
- 2ish yards for the backing : The skirt by these directions ends up being about 50” diameter so I used a wider denim backing but you could total piece together a backing for this too.
- Binding strips – Bias binding recommended
- 2 pieces of batting about 25” x 60” each : You could use a bunch of scraps if you need to. Definitely use something without much loft and stretch. I used Warm & Natural. This length of batting will give you just enough for the skirt and maybe one extra triangle each in case of miscuts or adjustment. (If you want to make matching stockings you could lengthen your batting to maybe 70” long)
- Spray Baste or Pins, thread
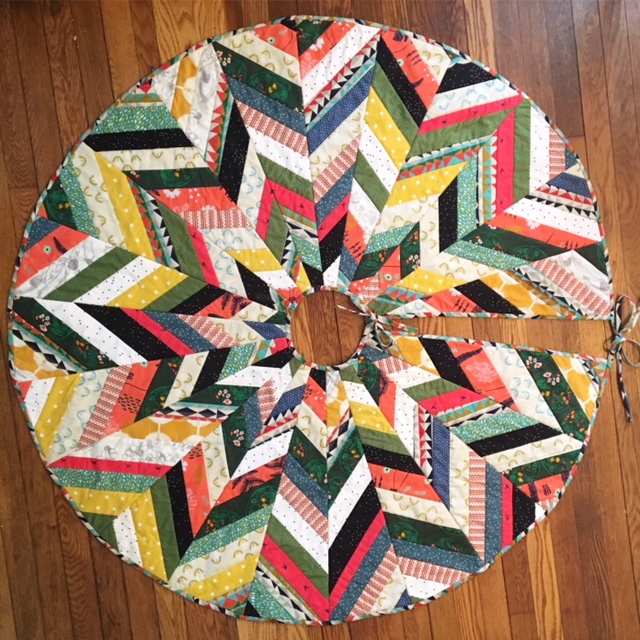
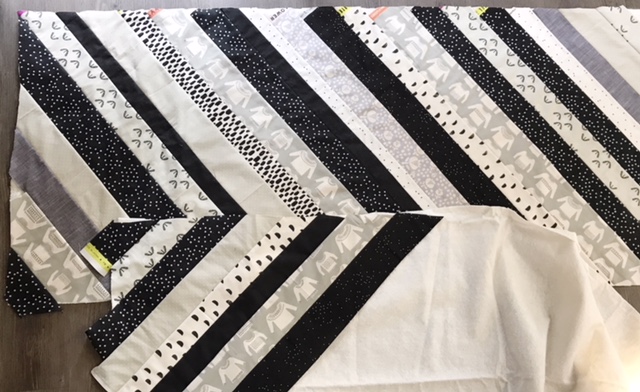
- Cut your fabric : Cut a bunch of width-of-fabric strips in varying sizes. I like to cut most of my strips between 2” and 3.5”. Play with this as you make your first panel and find your own rhythm. (In the various pictures on this post you’ll see the live-and-in-color skirts utilize smaller strips and more variation and the black-and-white skirt I cut bigger bolder strips for a different effect.) You will probably cut more strips as you go along so start with maybe 2-3 strips from each fabric to start.
- Start to sew your strips on to your batting : This uses a quilt-as-you-go method so each strip will be secured to the batting as you go along. Lay out one of your batting rectangles, take two strips face to face (or start with some scraps) and place diagonal on the batting (make sure the ends of the strips will cover the batting even once you press open). Sew a 1/4” seam along one edge of the strip and press the two strips open. Trim edges even with batting and set aside remainder of strip to use again.

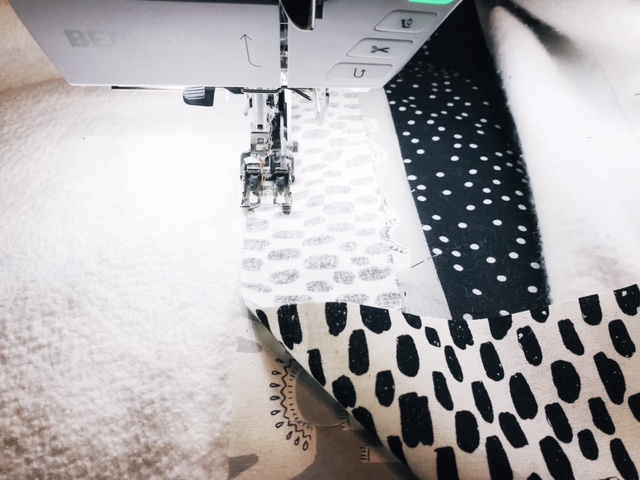
- Keep going : Grab another strip, line up and place face to face with strip on batting. Sew another 1/4” seam, press open, and trim even with batting. Continue across batting until you have covered the full piece . Note : This is sort of a quick-and-dirty method and I don’t much worry if the batting starts to stretch or if peices start to curve. If things get too wonky place a few strips in a manner that kind of straightens things back out. Once these panels are cut up you won’t notice these issues.
- Set out your second batting rectangle and lay out your first strips in the opposite diagonal. Sew strips to your batting as you did on your first until you’ve covered this length.
- You should now have two 25” x 60” panels of quilted strips!
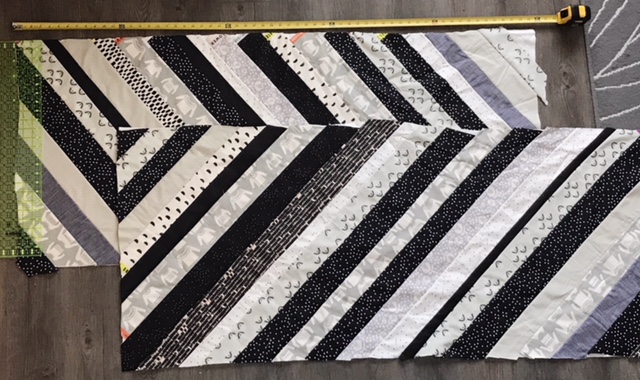
- Slice them up : using your template and long ruler start slicing your triangles. You’ll flip the template back and forth across the length of both panels until you have 9 from each panel (total of 18). As you cut you can adjust the angle of your strips. This will effect what your starburst looks like! You could use a really shallow angle or a really sharp angle. you could even shift the template a bit and vary it a bit between each piece if you wanted. I tended to keep a pretty consistent angle.


- Start to lay out your skirt : You can fudge these around for some time until you see what you like. I find it helpful to take a picture from above and check to see if I like how the colors are lining up or if there are any directional prints I want to keep towards the front of the skirt etc. In my black and white skirt I tried to keep the sweaters facing the front of the skirt when possible.


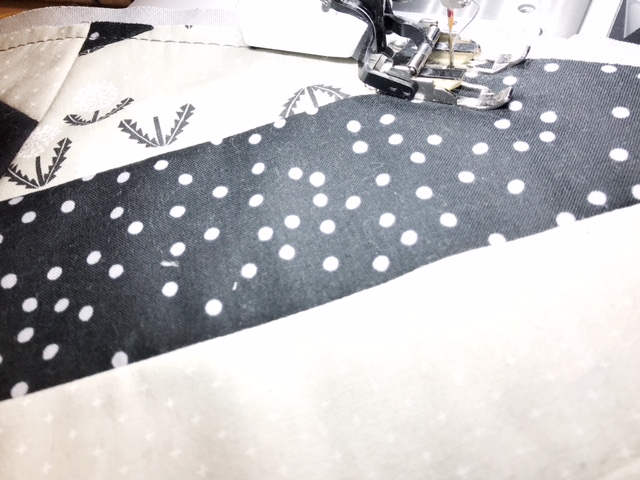
- Once you have everything laid out as you like, start to sew together two wedges at a time using a 1/4” seam and press the seam open (I press open because it helps with the bulk of the batting.


- Work your way around the circle until everything is connected. I typically work my way around from the tree skirt opening, two at a time, and then two at a time again etc to keep from having too much bulk up at my machine at any given time until it’s absolutely necessary.


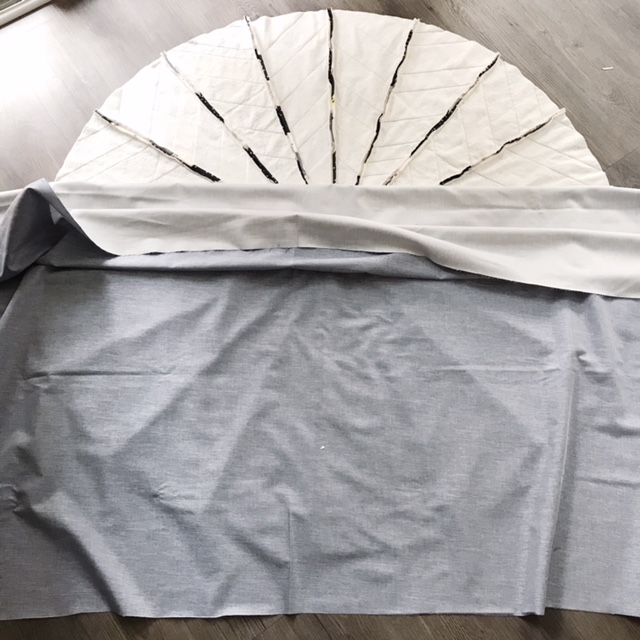
- Admire your skirt! Time to back it! If you want your skirt to be extra puffy you could totally add another layer of batting here between the skirt and your backing, but I usually just back it. Now is also a good time to give your machine some love – all that batting creates a LOT of LINT.
- Prepare your backing – you may have to piece together your backing unless you use a fabric that has an extra wide width.
- Lay out your skirt and backing, and spray baste the backing over the top of the skirt.
- Trim the exterior of the skirt backing. I find it easiest to quilt for a bit without cutting the tree opening quite yet so I leave this intact as a big circle for a while.


- Baste stitch around all the edges to help secure the backing
- QUILT – or… NOT? Because your strips are all pieced directly onto the batting, you technically could totally skip quilting if you like, but who doesn’t love a little extra detail? Quilt this up however you like. Hand quilt it. Machine Quilt it. Embroider it. A lot. A little. Whatever your quilty heart desires.


- Binding – I bind my skirt and use the length of binding to form ties on the opening side. Prepare your binding strips and cut lengths to fit the opening sides, bind these first so that your binding around the circles covers the rough edges.


- For binding the circular opening and skirt edge use bias binding. Cut your binding lengths to extend past the edge of the skirt by about 8” on each side. After applying binding to the skirt, edge stitch to close the edge of the binding excess that will form the ties for the skirt.


- Admire your skirt! Get it under your tree! Happy Making!
")


I love it – LOVE IT love it. Pinned & errything!
LikeLike
I literally CANNOT WAIT to see what new versions people churn out!!!
LikeLike
Oooo! I have been looking for an awesome tree skirt pattern and I just found yours! Yay for me. 🙂 thanks so much for sharing. Love the scrappiness, and it doesnt look too hard. Perfect.
LikeLike
This method is very adaptable to your own taste and it’s definitely beginner friendly! Let me know if you have any questions! Happy Making ❤️
LikeLike
Thank you sooo much for this tutorial!! I’m sitting here with my mom going on and on about it trying to convince her we need to start on this TODAY!!
LikeLike
Yay! Do it! You won’t regret it! ❤️
LikeLike
Perfect ‘tute. Thanks so much🙋🏼♀️
LikeLike
I’m going to try my hand at this beautiful tree skirt. Got the pattern printed and getting ready to order my fabric. Can you tell me how fabric you used (approximately) for the binding and ties?
LikeLike
🙂
LikeLike
Great tutorial! I think I can do this. I have been wanting a new tree skirt.
LikeLike
Did you put ties at the inner circle as well? It’s hard to tell from the pictures. Or is it just bound and then ties at the bottom?
LikeLike
I have ties at the inner and outter circles. I bind the two straight sides of the opening first and then bind the circles OVER the straight side and then sew along the edge of the binding that forms the ties. Does that make sense? I could add more binding photos when I finish the skirt I’m working on 🙂
LikeLike
Lovely Tree Skirt tutorial! Thank you. When I first saw your picture, I thought it looks a lot like a project Maureen Cracknell would do. Then you said Quilt as you Go and that could be another clue. I have watched her Craftsy class, but I don’t know if she had a Christmas Tree skirt, but she likes the QAYG method. Looking forward to following you as I found you through Then Came June.
LikeLike
I love, love, love this! I would love to make one but closer to 60 inches or more in diameter. (My husband gets really big and wide trees) I’m such a newbie and I have no idea how to do this. Would you please advise me on this? Thank you!
LikeLike
Hi Megan! I would start by printing out the template and then taping some more paper at the bottom. Take your ruler and extend the lines down to make the template longer.
LikeLike